
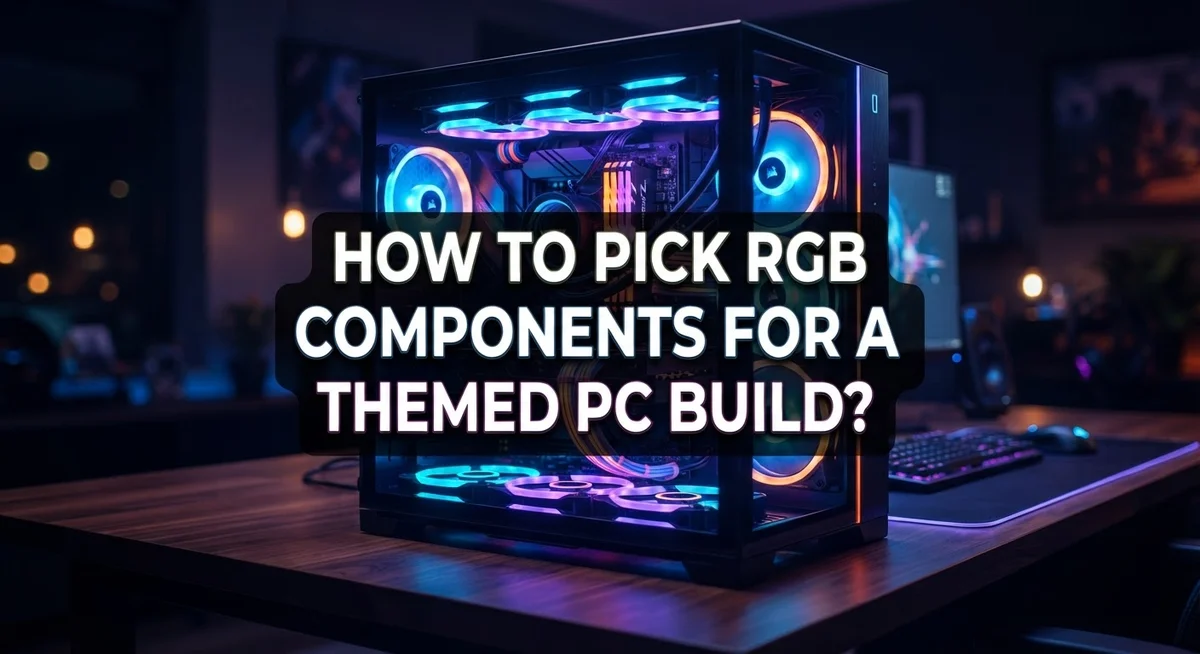
How to Pick RGB Components for a Themed PC Build
Building a themed PC is exciting. You get to blend performance with personal style. But picking the right RGB components can feel tricky if you don’t know where to start.
Color coordination matters just as much as picking good parts. A mismatched build can look messy instead of stunning. That’s why planning your RGB setup early makes a big difference.
This guide walks you through the process step by step. You’ll learn which components to prioritize first for maximum visual impact. We’ll also cover how to avoid common mistakes that ruin themed builds.
You’ll discover why RGB fans deserve your attention before anything else. We’ll explain how case clearance affects your final look. You’ll also learn why your monitor choice can make or break your color theme.
By the end, you’ll understand how to create a cohesive, eye catching build. Every RGB element will work together instead of clashing. Your PC will reflect the exact theme you imagined from the start.
Let’s break down each step so your build looks as good as it performs.
In a Nutshell
Here’s a quick summary to keep in mind while you plan your build.
-
Start with RGB fans. They create the biggest visual impact, so pick these before any other component.
-
Check your case clearance. Make sure it fits your GPU, CPU cooler, and PSU before you fall in love with its looks.
-
Match your ARGB standard. Stick with 5V Addressable RGB using standard 3-pin headers with a 4-pin footprint for smooth compatibility.
-
Confirm motherboard support. Your motherboard needs the right ARGB header, or your fans won’t sync properly.
-
Pick a monitor with an IPS panel. This panel type shows vibrant, accurate colors. Avoid TN panels since they wash out RGB effects.
-
Plan your cable management early. Tuck away RGB wiring so your build looks clean, not cluttered.
-
Use RGB software for control. This helps you unify colors across all parts and nail your color theme with ease.
Follow these points, and your themed build will look sharp and stay functional.
Understanding RGB Standards and Header Types
RGB standards determine whether your components work together smoothly or create frustrating compatibility issues. Understanding these standards prevents wasted money and setup headaches down the road.
The most common standard for modern PC builds is 5V Addressable RGB, often called ARGB. This system uses a 3-pin connector with a 4-pin footprint on your motherboard. The key difference between ARGB and older RGB is that addressable versions let you control each LED individually. This means you can create dynamic color patterns and animations across your entire build.
Standard RGB (non-addressable) uses a different approach. It typically features a 4-pin connector and controls all LEDs as one unit with the same color. While simpler, standard RGB offers less creative control. Most newer builds use ARGB because it provides superior visual effects and synchronization options.
Header types matter significantly for your build’s functionality. Your motherboard has specific ARGB headers where you plug in fan cables and lighting hubs. Most modern motherboards include at least one ARGB header, but some budget models skip this feature entirely. Check your motherboard manual before purchasing RGB components to confirm header availability.
Voltage compatibility is critical. Using 12V components on a 5V header damages your parts permanently. Always verify your components match your motherboard’s voltage specifications. The connector shape alone doesn’t guarantee compatibility, so read the manual carefully.
RGB hubs act as intermediaries when you have more RGB devices than available headers. These hubs connect to a single motherboard header and allow you to daisy-chain multiple fans or lighting strips. Hubs simplify cable management and expand your RGB possibilities without requiring additional motherboard headers.
Understanding these standards takes just a few minutes but saves considerable frustration later. Take time to review your motherboard specifications and RGB component requirements before finalizing your parts list. This preparation ensures everything communicates properly and your theme comes together exactly as planned.
Starting with RGB Fans as Your Visual Foundation
RGB fans serve as the visual anchor for your entire build. They occupy prime real estate inside your case, and their lighting dominates what people see when they look at your PC. This is why starting with fans first makes perfect sense.
When you pick RGB fans, you’re essentially choosing the color palette for everything else. If you select blue fans, your remaining components should complement that blue theme. This approach keeps your build cohesive and intentional rather than chaotic.
Consider how many fans your case supports. Most cases accommodate between two and six fans depending on size. Front intake fans, rear exhaust fans, and top exhaust positions all offer visibility. Prioritize the front intake fans since they catch light most effectively and appear most prominent to viewers.
The fan size matters for both performance and aesthetics. Common sizes include 120mm and 140mm fans. Larger fans move air more efficiently and look more impressive visually. Smaller fans work well for tight spaces but provide less visual impact.
Pay attention to fan blade design too. Some fans feature solid blades while others have translucent designs. Translucent blades allow light to shine through the fan itself, creating a more dramatic effect than solid blades alone.
Your motherboard’s ARGB headers determine how many fans you can control simultaneously. Most modern motherboards include one or two dedicated ARGB headers. If you want more fans than available headers, you’ll need an RGB hub to expand your connectivity.
Before committing to specific fans, verify your case has adequate space for them. Measure clearance around fan mounting areas. Some cases have obstructions that prevent certain fan types from fitting properly.
Once you’ve selected your RGB fans, you’ve established your build’s visual foundation. Everything else flows from this choice, making fan selection the most important decision in your themed PC journey.
Choosing a Case with Proper Clearance and Airflow
Your case is the container that holds everything. It must have enough space for your GPU, CPU cooler, and power supply without cramping your components. A cramped case means poor airflow, which damages performance and RGB lighting visibility.
Start by measuring your GPU length. Most modern graphics cards range from 250mm to 350mm. Your case needs clearance behind the motherboard tray to accommodate this length. Check the manufacturer’s specifications for maximum GPU support before purchasing anything.
Your CPU cooler height matters too. Tower coolers can reach 160mm or taller. Some cases have limited vertical space, especially compact builds. Measure from your motherboard to the case’s top panel to confirm your cooler fits without touching the side panel.
Power supply placement affects everything. Bottom mounted PSUs need clearance for cable routing and airflow. Top mounted units require different consideration. Your case design determines where the PSU goes, so verify this matches your components.
Airflow directly impacts RGB visibility and component longevity. Cases with mesh front panels allow more air intake than solid designs. Better airflow keeps components cooler, which improves RGB LED brightness and lifespan. Hot components can cause RGB colors to appear dimmer or distorted.
Fan mounting positions are critical. Most cases support front intake fans, rear exhaust fans, and top exhaust options. Your RGB fans need mounting locations that showcase their lighting. A front mounted RGB fan is far more visible than one hidden in the back.
Check cable routing paths inside your case. RGB cables need space to run without blocking fans or getting pinched. Poor cable management restricts airflow and hides your RGB investment.
Plan your airflow pattern before building. Draw a simple diagram showing fan positions and airflow direction. This prevents mistakes during assembly and ensures your RGB fans perform at their best while keeping everything cool and visible.
Coordinating Motherboard, GPU, and Cooler RGB
Your motherboard acts as the central hub for all RGB components. It contains the ARGB headers that power and control your fans, cooler, and GPU lighting. Before selecting other RGB parts, check your motherboard’s manual to see how many ARGB headers it has available.
Most modern motherboards include one or two ARGB headers. Each header can typically control multiple devices if you daisy chain them together. Some motherboards also feature RGB headers, which differ from ARGB headers. Understanding this distinction prevents buying incompatible components that won’t sync with your system.
Your GPU produces significant heat and light, making its RGB cooling solution highly visible. When coordinating GPU RGB with your motherboard, verify that your GPU’s cooler connects to the correct header type. Some aftermarket GPU coolers use ARGB, while others use standard RGB. Check your GPU’s documentation before purchasing a replacement cooler.
Your CPU cooler sits at the center of your build and draws immediate attention. The cooler’s RGB lighting should complement your theme. Verify that your cooler’s connector type matches your motherboard’s available headers. Tower coolers and AIO liquid coolers both come in RGB variants, so you have flexibility here.
Cable management becomes crucial when coordinating multiple RGB components. ARGB cables need routing through your case without blocking airflow or obscuring your view of components. Plan your cable paths before assembly to avoid messy, tangled wiring that detracts from your RGB theme.
Consider using an RGB hub if your motherboard lacks sufficient headers. Hubs connect to a single motherboard header and allow you to attach multiple devices. This solution keeps everything synchronized through one control point. Your motherboard manufacturer often provides compatible hub options that work seamlessly with their ARGB software.
Matching a Monitor Panel to Your Color Theme
Your monitor panel type directly affects how your RGB components appear. Different panel technologies display colors differently, so choosing the right one matters for your theme.
IPS panels excel at showing vibrant, accurate colors from multiple angles. If you want your RGB setup to look its best, an IPS panel will render those colors faithfully. The colors stay consistent whether you’re looking straight on or from the side.
VA panels offer deeper blacks and higher contrast ratios. They work well if your theme emphasizes dark colors with accent lighting. However, they have narrower viewing angles than IPS panels, so colors shift if you’re not sitting directly in front.
TN panels are budget friendly but have significant drawbacks for RGB builds. Colors appear washed out and shift dramatically at different angles. Your carefully coordinated RGB theme loses impact on a TN display. Avoid these panels if color accuracy matters to your build.
Consider your monitor’s brightness and color gamut settings. A dimmer monitor won’t showcase your RGB lighting effectively. Adjust brightness to medium or higher to let your components shine. Color gamut refers to the range of colors the monitor can display. A wider gamut shows more color variation in your RGB setup.
Refresh rate and resolution don’t directly affect RGB appearance, but they influence your overall experience. A sharp, smooth display makes your build look more polished.
Match your monitor’s color temperature to your theme. Cooler monitors (6500K) suit blue or white RGB themes. Warmer monitors (5500K) complement red or orange themes better.
Test your monitor settings before finalizing your RGB component purchases. Spend time adjusting contrast, brightness, and color temperature. This ensures your monitor displays your theme exactly as you envision it. The right monitor transforms your RGB investment into a stunning visual experience.
Step-by-Step Process for Building a Cohesive RGB Theme
Start by selecting your RGB fans first. Fans are the most visible components in any build. They catch light from every angle and set the tone for your entire theme.
Next, measure your case dimensions carefully. Check the width, depth, and height of available fan mounting spots. Most cases support 120mm or 140mm fans, but some support both sizes. Write down these measurements before you shop.
Consider your GPU length next. A long graphics card can block fan mounting positions. Measure from the slot to the front of your case. This determines if you can mount fans in front of the radiator or if you need to use the top or rear instead.
Your CPU cooler height matters too. Tall air coolers can interfere with top fan placement. Check your cooler’s specifications against your case’s internal height. Some cases have limited vertical space for both coolers and fans.
Plan your power supply location. Most modern cases place the PSU at the bottom with a separate chamber. This keeps cables away from your RGB components and improves airflow. Some older cases mount the PSU at the top, which affects fan positioning.
Now think about your color theme. Do you want a single dominant color, or a gradient effect? Pick two or three colors maximum for visual harmony. Write down these colors so you remember them when selecting other RGB parts.
Verify your motherboard’s ARGB headers. Check your motherboard manual for the number and location of 3 pin ARGB headers. Most boards have one or two headers. This limits how many RGB devices you can connect directly.
Finally, plan your cable routing. RGB cables need clear paths to avoid blocking fans or looking messy. Trace these paths inside your case before assembly. This prevents frustration during the actual build process.
Common Mistakes to Avoid When Planning RGB Builds
Many builders make avoidable mistakes when planning RGB builds. Understanding these errors helps you save money and create a cohesive setup.
Ignoring RGB standard compatibility tops the list. Most modern components use 5V Addressable RGB (ARGB) with 3-pin headers. However, some older parts or budget options use different standards. Mixing incompatible RGB types means certain components won’t sync with others. Always check your motherboard’s ARGB header specifications before purchasing any RGB part.
Selecting your case based on looks alone creates real problems later. A beautiful case might not fit your GPU, CPU cooler, or power supply. You’ll discover clearance issues after buying everything. Measure your components first, then choose a case that accommodates them while supporting your RGB vision.
Choosing the wrong monitor panel type undermines your entire RGB investment. TN panels display washed out colors and look poor from angles. Your expensive RGB components simply won’t look vibrant on these screens. IPS panels show your RGB lighting accurately from different viewing positions.
Overlooking motherboard header limits causes frustration during assembly. Your board might have only one or two ARGB headers. If you plan six RGB fans plus other components, you’ll run out of connections. Count your RGB parts and verify your motherboard can support them before building.
Neglecting cable management planning leaves your build looking messy. RGB cables are thicker and more numerous than standard cables. Plan your cable routes before installation. Poor cable management hides your RGB components behind tangled wires.
Failing to coordinate colors early results in mismatched themes. Pick your primary color scheme first. Then select RGB fans, coolers, and other parts that match this theme. This prevents buying components that clash with your vision.
Final Thoughts
Building a themed RGB PC takes planning, but the results are worth it. Your build reflects your style once every part works in harmony.
Start with fans since they create the biggest visual impact. Then build outward from there, checking clearance and compatibility at each step.
Compatibility matters more than looks. A gorgeous case means nothing if your GPU or cooler does not fit inside it. Always check specs before you buy anything.
Your motherboard’s ARGB headers control your entire lighting setup. Confirm header count and type early so you avoid frustrating surprises during assembly.
Color theory plays a bigger role than most builders expect. Pick a primary color and stick with it across fans, strips, and accessories. This creates a clean, unified look instead of a mismatched mess.
Your monitor deserves attention too. An IPS panel shows your RGB colors accurately, while a washed out screen ruins even the best lighting setup.
Cable management ties everything together. Hidden cables let your RGB components shine without visual clutter competing for attention.
Take your time with each decision. Rushing through component selection often leads to compatibility issues or mismatched colors later.
Testing your setup before finalizing purchases saves money and stress. Adjust your monitor settings and preview colors whenever possible.
Remember that RGB software lets you fine tune colors after installation. This flexibility means small mismatches are not the end of the world.
Your themed build should feel personal and intentional. Every glowing fan and lit up component tells a story about your style.
With careful planning, your RGB build becomes more than just a PC. It becomes a statement piece that lights up your space and shows off your personality.
Take these steps seriously, and your finished build will look professional, cohesive, and genuinely impressive to anyone who sees it.
Frequently Asked Questions
What RGB standard should I use for my PC build?
Use 5V Addressable RGB (ARGB) with 3-pin headers. This is the current standard for most PC components. Your motherboard will have ARGB headers that control all connected parts. Check your motherboard manual to see how many headers you have available.
Some older RGB uses 12V standards, but ARGB gives you better color control. Make sure all your fans, coolers, and accessories match the same standard. Mixing standards creates compatibility problems during assembly.
Should I prioritize RGB fans or other components?
RGB fans matter most because they create the biggest visual impact. You see them constantly during gameplay and everyday use. Start your build by selecting fans that match your color theme.
After fans, consider your CPU cooler and case lighting next. GPU lighting comes later since it’s less visible. Accessories like RAM covers and cables are nice but less important for the overall look.
How do I coordinate colors across different RGB components?
Pick your main theme color first. Then select components that match that color. For example, if you want a blue theme, choose blue fans, a blue cooler, and blue case lighting.
Use RGB software to fine tune colors after installation. Most motherboards include control software that lets you adjust brightness and effects across all connected parts. This helps you get precise color matching even if components look slightly different in the box.
What happens if my motherboard doesn’t have enough ARGB headers?
Most modern motherboards have 1 to 3 ARGB headers. If you need more, use RGB hubs or splitters. These accessories let you connect multiple components to a single header.
Check your motherboard manual before buying components. Count how many ARGB devices you plan to use. Plan your setup accordingly to avoid surprises during building.

DK is a tech enthusiast and product reviewer dedicated to helping readers navigate the ever-evolving world of technology. With a passion for testing and comparing the latest gadgets, software, and AI tools, DK breaks down complex tech into simple, actionable insights for everyday users.


