
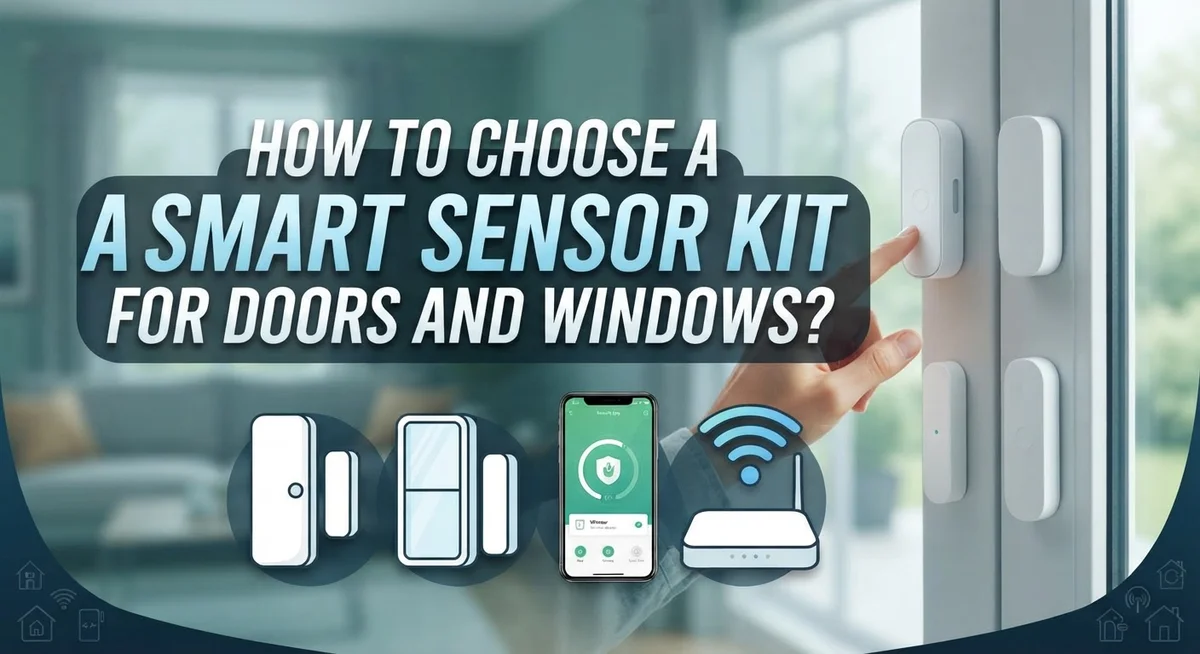
How to Choose a Smart Sensor Kit for Doors and Windows?
Do you want to know when a door opens in another room? A smart sensor kit can tell you right away. It sends an alert to your phone the moment a door or window moves.
These small devices use a simple magnet based system. One part sits on the frame. The other sits on the door or window itself.
When the two parts separate, the sensor knows the door is open. It then sends a signal to your smart home app. This helps you monitor your home even when you are away.
Choosing the right kit can feel tricky though. There are many brands, sizes, and features to compare. Some work with certain platforms while others do not.
This guide will help you pick the best sensor kit for your needs. We will cover how these sensors work and what they actually detect. You will learn about installation tips and common mistakes to avoid.
We will also explain how to check platform compatibility. By the end, you will feel confident choosing a kit that fits your home perfectly.
In a Nutshell
Choosing a smart sensor kit does not need to be hard. Here are the key points to remember before you buy.
-
Check compatibility first. Make sure the sensor works with your existing home automation platform. This step saves you from returning items later.
-
Look at size and design. A compact sensor blends into your door frame. This matters if you care about how your home looks.
-
Understand the core function. These sensors only detect open or closed status. They do not detect motion or catch intrusion attempts.
-
Clean before you install. Wipe the surface of your door or window frame first. This helps the sensor stick properly and last longer.
-
Test before full setup. Try the sensor on one door first. Confirm it connects and responds well before adding more units.
-
Plan your automation rules. Decide what actions you want, like lights turning on or alerts sending to your phone. Think about time and people based conditions too.
Keep these points in mind. You will pick a sensor kit that fits your home and your needs perfectly.
What Are Smart Door and Window Sensors and How Do They Work?
Smart door and window sensors are small devices that monitor whether your doors and windows are open or closed. They work using a simple magnet based system that triggers when the two parts separate.
Here’s how the system functions. Each sensor kit includes two components: a sensor base and a magnet. You mount the sensor base on your door or window frame. The magnet goes on the moving part, like the door itself. When someone opens the door, the magnet moves away from the sensor base. This separation triggers the sensor to send a signal.
The sensor detects only open and closed status. It cannot detect motion, intrusion attempts, or who opened the door. This is an important distinction when choosing your kit.
Once triggered, the sensor communicates with your home automation platform. Popular platforms include Home Assistant, Homey, and Ecobee. The sensor sends a wireless signal that tells your system the door opened.
Your home automation system then performs actions you’ve set up. These actions might include turning on lights, sending alerts to your phone, or unlocking other smart devices. You control what happens through automation rules you configure.
The installation process is straightforward. You clean the mounting surface first, then attach the sensor base and magnet using the provided adhesive or screws. Proper surface preparation ensures reliable contact detection.
Smart sensor kits provide real time awareness of door and window activity. They form the foundation of a security monitoring system and enable countless automation possibilities. Understanding how they work helps you choose the right kit for your specific needs and home setup.
Why Your Home Needs a Smart Sensor Kit
Your home’s security and comfort depend on knowing what’s happening at your entry points. A smart sensor kit gives you real time visibility into door and window activity, whether you’re home or away.
These kits solve several practical problems. You get instant alerts when doors open unexpectedly. You can automate lights to turn on when someone enters a room. You can verify that windows stay closed at night. Parents can monitor when kids arrive home from school.
Smart sensors also work with your existing routines. Imagine your coffee maker starting when you open the kitchen door in the morning. Or your porch light activating before you reach your front entrance. These automations happen because the sensors communicate with your home automation platform.
The security benefits are significant. You receive notifications on your phone if a door opens during hours when it shouldn’t. You can check sensor status from anywhere, giving you peace of mind while traveling. You’ll know immediately if a window was left open before a storm arrives.
Beyond security, smart sensors reduce energy waste. They help you understand traffic patterns in your home. You can see which doors and windows get used most frequently. This data helps you make better decisions about heating, cooling, and lighting.
Installation is straightforward and doesn’t require professional help. The sensors mount easily using adhesive strips or small screws. Most people complete setup in under an hour.
A smart sensor kit essentially extends your awareness. You gain control over your home’s access points and can respond quickly to unexpected activity. This foundation of visibility becomes the starting point for building a truly connected home.
Key Features to Evaluate Before Choosing a Sensor Kit
Before you choose a smart sensor kit, focus on what actually matters for your specific needs. Start by identifying which doors and windows need monitoring. Your front door matters more than a bedroom window, so prioritize accordingly.
Compatibility is your first checkpoint. Check if the sensor works with your home automation platform. Popular systems include Home Assistant, Homey, and Ecobee. A sensor that doesn’t connect to your existing setup creates frustration. Visit the manufacturer’s website and verify platform support before making any decision.
Size and design affect daily life. A compact sensor stays invisible on your door frame. Larger sensors stick out and catch attention. Think about how visible you want the device to be. Some people prefer discreet installation while others don’t mind obvious placement.
Reliability matters more than fancy features. Contact sensors do one job well: they detect open and closed status. That’s it. They don’t sense motion or intrusion attempts. Choose a kit with proven reliability rather than one packed with unnecessary features.
Battery life keeps your system running. Check how long batteries last in the sensors. Some last months while others need frequent replacement. Factor in how many sensors you’re installing. More sensors mean more battery replacements.
Range and signal strength prevent dead zones. Verify the sensor communicates reliably from your doors and windows to your hub. Thick walls or distance can weaken the signal. Test the range in your specific home before full deployment.
Installation requirements vary. Some sensors mount with adhesive strips while others use screws. Decide what works for your walls and door frames. Clean surfaces properly before mounting ensures reliable contact.
Checking Smart Home Platform Compatibility
Your smart sensor kit only works well if it connects to your home automation platform. This is the most important step before you buy anything.
Start by identifying which platform you already use or plan to use. Common options include Home Assistant, Homey, Ecobee, and similar systems. Each platform supports different sensor brands and communication methods. Some sensors use WiFi, while others use Zigbee or Z-Wave technology.
Check the sensor’s compatibility list on the manufacturer’s website. Look for your specific platform name in their documentation. Don’t assume a sensor works with your system just because it’s popular. Many well-reviewed sensors don’t connect to all platforms.
Test compatibility before full installation. If possible, borrow a sensor or purchase one unit first to verify it pairs with your platform. This prevents buying multiple incompatible units later.
Consider the communication protocol your platform prefers. Some platforms work better with Zigbee sensors, while others favor Z-Wave or WiFi. Your choice here affects reliability and response time.
Verify that your platform supports the automation features you want. For example, if you need time-based rules like “lock the door at 9 PM,” confirm your platform handles this. Some systems offer limited automation compared to others.
Check if your platform requires a hub or gateway. Some sensors connect directly to your WiFi router, while others need a separate hub device. This affects your setup complexity and cost.
Read user reviews specifically mentioning your platform. Real users often share compatibility issues or setup problems. Their experiences help you avoid frustration later.
Platform compatibility determines whether your entire system works smoothly. Taking time to verify this connection prevents wasted money and installation headaches.
Step-by-Step: Installing and Configuring Your Sensors
Installing your smart sensors correctly makes the difference between a system that works and one that doesn’t. Start by gathering what you need: the sensor components, a clean cloth, and your home automation app ready on your phone.
Clean the installation surface first. This step prevents sensor failure. Wipe the door or window frame with a dry cloth to remove dust, dirt, and moisture. A clean surface ensures the adhesive backing sticks properly and the magnet maintains good contact.
Position the sensor base on your door or window frame. Most sensors mount on the stationary part of the frame. The magnet goes on the moving part, so it triggers when the door or window opens. Keep them aligned and close together, usually within half an inch.
Press the sensor firmly into place. Hold it for several seconds so the adhesive sets. If your kit includes screws as an alternative, use those for maximum stability, especially on doors that open and close frequently.
Now configure your automation rules. Open your home automation app and add the new sensor. Most platforms guide you through this with simple steps. You’ll set conditions like time of day or who’s home, then choose actions such as turning on lights or sending alerts.
Test the sensor by opening and closing your door or window several times. Watch your app to confirm it detects each change instantly. Adjust the magnet position slightly if detection feels slow or unreliable.
Finally, set up your desired automations. Create rules that match your daily life. You might trigger porch lights when the front door opens at night, or receive notifications when windows open while you’re away.
Setting Up Automation Rules and Alerts
Automation rules and alerts form the backbone of your smart sensor system. These features transform simple open/close detection into intelligent home behavior that works for you automatically.
Start by opening your home automation app after your sensors are installed and tested. Most platforms organize rules in a simple format: “When this sensor does this, then make that happen.” You choose the trigger (door opens), the conditions (time of day or who’s home), and the action (send alert or turn on lights).
Time-based rules are incredibly useful. You can set different behaviors for daytime versus nighttime. For example, if your front door opens after midnight, the system alerts you immediately. During business hours, the same door opening might simply log the event without sending notifications.
People-based conditions add another layer. Your system can check if anyone is home before triggering actions. If everyone is away and a window opens, you get an alert. If you’re home, the sensor might just turn on nearby lights instead.
Set up alerts for security-critical doors and windows. These notifications come through your phone, email, or smart speaker. Test your alert settings by opening and closing doors manually. Verify you actually receive the notifications and that they appear on all your devices.
Create separate alert levels for different sensors. Your garage door might only log activity, while your front door sends urgent notifications. This prevents alert fatigue from less important events.
Review and adjust your automation rules monthly. As your routines change, your rules should change too. Remove alerts that no longer serve you. Add new automations as you discover helpful combinations.
Common Mistakes to Avoid When Choosing and Installing Sensors
Installing smart sensors seems simple, but small mistakes can cause big problems. Understanding these errors helps you get the most from your system.
Surface preparation matters more than most people think. Many users skip cleaning the installation area and wonder why sensors fail. Dust, dirt, and moisture create barriers between the magnet and sensor base. Your sensor cannot detect properly without solid contact. Always wipe your door frame or window sill with a dry cloth before mounting anything.
Misalignment causes detection failures. The magnet must stay perfectly positioned opposite the sensor base. Even slight shifts break the connection. When installing, measure twice and mount once. Test the open and close action multiple times before finalizing placement.
Choosing the wrong platform creates frustration later. Some sensors work only with specific home automation systems. You cannot force compatibility. Verify your sensor works with your chosen platform before purchase. Check the manufacturer’s compatibility list and read reviews from users on your exact platform.
Overlooking sensor aesthetics leads to regret. Large or bulky sensors look obvious on doors and windows. This visibility bothers many homeowners. Consider the sensor size and design before buying. Compact models blend better with your home’s appearance.
Skipping the testing phase invites problems. Install one sensor first and test all functions thoroughly. Verify the alert notifications reach your phone. Confirm automation rules trigger correctly. Only after successful testing should you install additional sensors throughout your home.
Ignoring the magnet placement creates the most common issue. The magnet must align with the sensor’s detection point. Improper spacing prevents reliable operation. Follow the manufacturer’s guidance on exact magnet positioning.
Tips for Testing and Maintaining Sensor Reliability
Testing your sensors regularly keeps your system working when you need it most. Start by opening and closing each door or window at least five times after installation. Watch your home automation app to confirm the sensor detects every movement. If the app shows missed detections, the magnet may have shifted out of position.
Clean your sensors every three months. Dust and dirt reduce the magnet’s ability to trigger the sensor properly. Use a soft, dry cloth to wipe both the sensor base and the magnet. Avoid water or harsh cleaning products that could damage the electronics.
Check your battery levels monthly through your home automation app. Most sensors send low battery alerts, but checking manually prevents surprises. Replace batteries before they die completely. A dead sensor leaves gaps in your security system.
Test your automation rules quarterly. Open a door or window and verify that your chosen action happens. Does the light turn on? Does the alert reach your phone? Sometimes your rules stop working after app updates or system changes.
Inspect the magnet alignment every few months. Temperature changes and vibrations can shift the magnet slightly over time. If your sensor stops detecting properly, adjust the magnet position back to its original spot.
Keep a simple log of your maintenance activities. Write down when you cleaned sensors, replaced batteries, and tested automations. This record helps you spot patterns and predict when maintenance is needed.
Regular testing and maintenance take only minutes but add years to your sensor reliability. Your system performs best when you give it consistent attention throughout the year.
Final Thoughts
Choosing the right smart sensor kit does not need to feel overwhelming. Focus on what matters most for your home.
Compatibility comes first. Check your home automation platform before you buy anything. A sensor that does not connect to your system becomes useless.
Size and design matter too. Compact sensors blend into door and window frames. Bulky sensors stand out and look unfinished.
Think about your specific security needs. Some doors need constant monitoring. Others just need basic status alerts.
Consider how many sensors you actually need. Count your doors and windows first. This helps you avoid buying too few or too many.
Battery life is another key factor. Longer battery life means fewer replacements. This saves you time and effort over the years.
Installation ease should factor into your decision. Simple mounting systems save frustration later. Look for sensors with straightforward setup processes.
Remember that these sensors only detect open and closed status. They do not detect motion or intrusion attempts directly. Keep this limitation in mind when planning your security setup.
Test any new sensor before relying on it fully. Early testing catches problems before they become bigger issues.
Your automation rules will only work as well as your sensors allow. Choose reliable hardware first. Build your automation strategy around that foundation.
Take time to research different options. Read reviews from other users. Compare features across multiple sensor kits.
The right choice depends on your home and your specific needs. There is no single perfect sensor for everyone. Match your selection to your actual requirements.
A well chosen sensor kit gives you peace of mind. It also makes your home smarter and safer every single day.
Frequently Asked Questions
What exactly do smart door and window sensors detect?
Smart contact sensors detect whether your doors and windows are open or closed. They use a magnet-based mechanism to trigger this detection. When the magnet moves away from the sensor base (because you opened the door or window), the sensor sends a signal to your home automation system.
These sensors do not detect motion, intrusion attempts, or who opened the door. They only track the open and closed status. This simple function makes them reliable and affordable for most homes.
Why should I use smart sensors for doors and windows?
Smart sensors enable two main benefits. First, they provide security monitoring. You get instant alerts when doors or windows open, whether you are home or away.
Second, they trigger home automation. Your lights can turn on automatically when you open the front door. Your heating system can adjust when windows open. These automations save energy and add convenience to your daily routine.
How do I know if a sensor will work with my home automation system?
Different sensors work with different platforms like Home Assistant, Homey, or Ecobee. Check your platform first before you buy any sensor. Visit your home automation system’s website and look for compatible device lists.
Contact the sensor manufacturer if you are unsure. Ask them directly which platforms their sensors support. This step takes five minutes but prevents frustration later.
What size sensor should I choose?
Compact sensors are generally better because they blend into your door and window frames. Large or bulky sensors look obvious and may bother you aesthetically.
Look for sensors around 1.5 inches tall or smaller. These dimensions fit most door frames without standing out. Visit product specification pages to compare sizes before making your choice.

DK is a tech enthusiast and product reviewer dedicated to helping readers navigate the ever-evolving world of technology. With a passion for testing and comparing the latest gadgets, software, and AI tools, DK breaks down complex tech into simple, actionable insights for everyday users.


